Thursday, 17 July 2014
Semester 3 e-portfolio update
Disclaimer: The portfolio for Studio 3, Building Science 1 and Building Construction 2 can be found from the above tabs, while Computer Applications Work in Progress is conducted on the foyer page below this post. Thank you.
Tuesday, 8 July 2014
Work in Progress for Computer Applications
Project 3 - A maximum 90 seconds Animation of the Completed 3D Scene
This final project of Computer Applications require us to create a 3d animation video of 60 to 90 seconds relating to our previous projects. Base on the retreat house's model, a creative animation is to be created which can show several techniques of animating objects. |
| Learning to create particles in 3ds Max. Super spray of teapots applied through geometric instances. |
 |
| Rain effect using PF source. This was a little confusing at first and it did not appear as what I expected. It involves forces wind and gravity. |
 |
| Making curtain movement using P array. |
 |
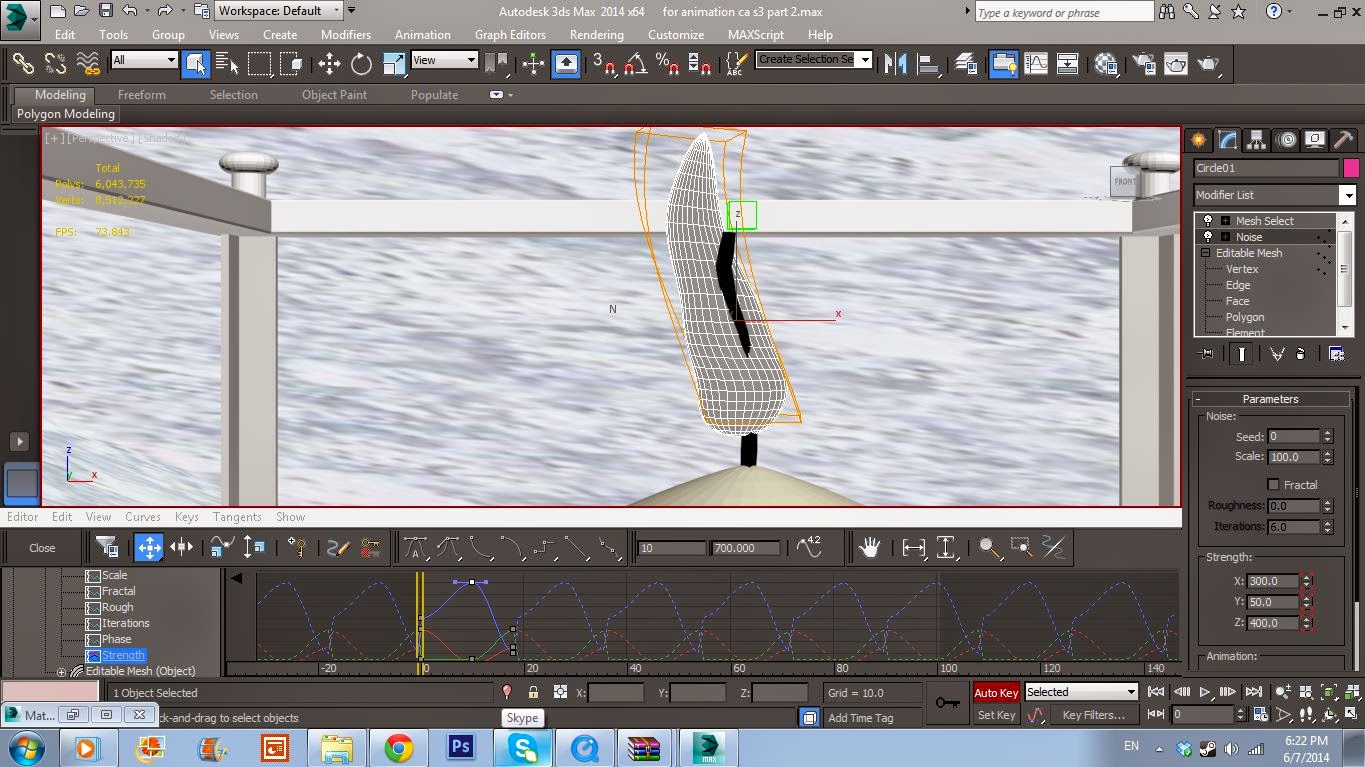
| I wanted to create the effect of leaves in the wind using super spray. Making of a leaf particle for geometric instances use by bitmap onto a plane. |
 |
| Adding an opacity alpha to the bitmapped leaf so it is properly shaped. |
 |
| Test rendered the leaf particle to check the effectiveness when rendering. |
 |
| Most part of the modelling involve importing object models to furnish the structure. This adds context to the retreat house. |
 |
| Creating the flame model for the candle and manipulating the mesh into the right shape. |
 |
| Looping the keys for flame movement. |
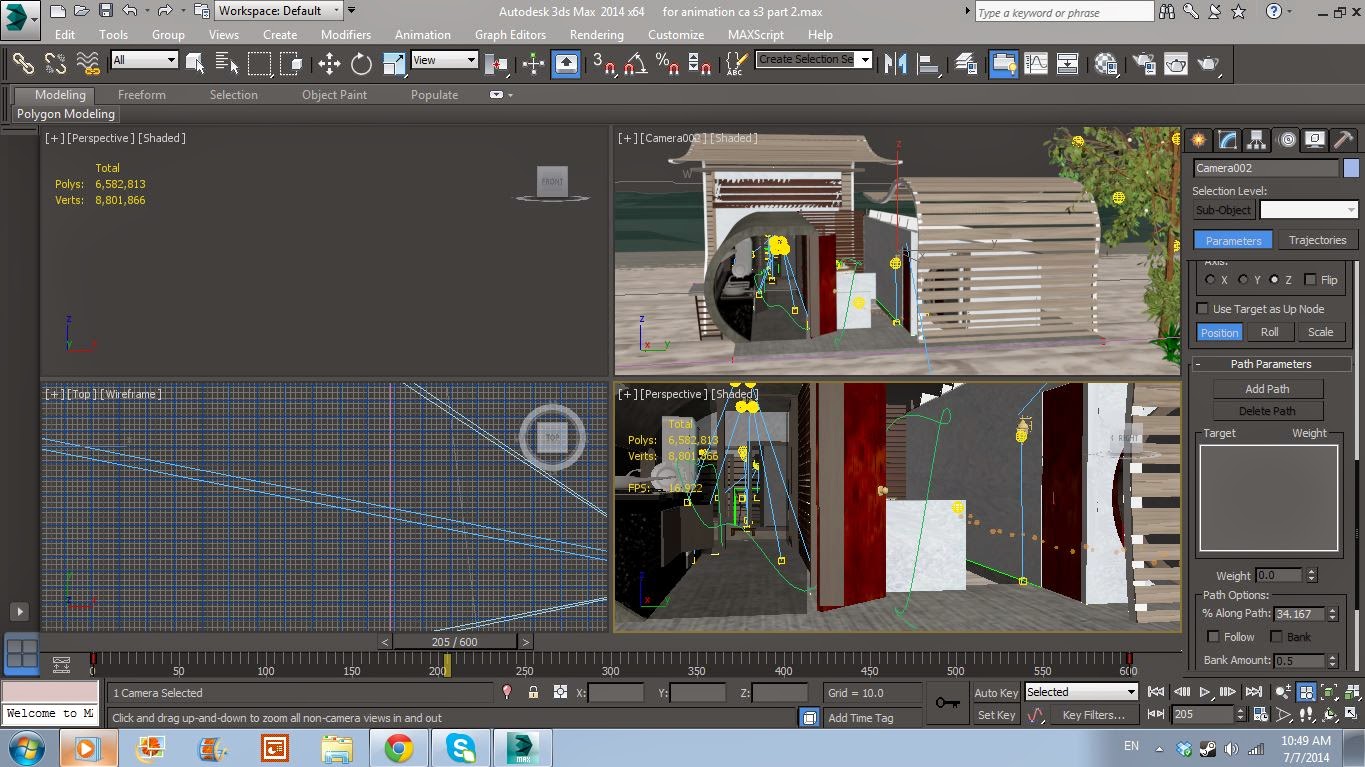 |
| Experimented with path constraint for the camera. Ended up putting it to just revolve slowly around the dining table and candle. |
 |
| Used PF source to add particles to the "ball of light". Wanted to have a fairy-like effect to add more fantasy expressions into the animation but it wasn't quite as I expected as the results were rather dim. |
 |
| Creating light spheres all around the trees and bushes to induce a firefly effect. |
 |
| Making down lights out of cylinders. |
 |
| Placing the light fixtures into the model. |
 |
| Test rendered the light and it appears to be weird, requiring readjustments. |
 |
| Lighting added with more minor adjustments... |
 |
| In process of rendering which took about a day and a half and 10 plus computers. Pays to create too many frames, and I ended up with over 4000 frames. The rendered clips were then edited and combined in Windows Live Movie Maker. |
End Product - Video animation on Youtube
The general idea is to engage with the light plays in the building. By putting it in an after dark environment to create a contrast with the lights. The animation presents itself from day plunging into night and the mystical light plays before it vanishes as the sun rises again.
Friday, 13 June 2014
Work in Progress for Computer Applications
Project 2B: Still Renderings with Materials, Lights, Camera Views with Site Context (Interior Renderings)
 |
| Learning to create an interior ambiance in class. I created a standard space with an opening that allows daylight to enter. |
 |
| Enhancing the interior natural lighting by increasing the number of FG bounces, it seems a little more brighter. |
 |
| Adjusted light intensity and changed the environment settings to indoor daylight. |
 |
| Readjusted camera and experimented with mr Sky Portal which allows a more natural look in the room. |
 |
| Imported the model from Rhino again. As this project focuses on the interior, exterior context such as trees and contours were omitted. This reduces any lags and also allows more input of materials. I created mr Sky Portal for all the openings around the selected interior space. |
 |
| Adjusting the camera to the selected space. This is basically a reading/ leisure room in the retreat house. It's a small space located in the front of the building which opens out to a sheltered balcony. Experimented with Raytrace, hoping to create sharper reflections in the glass, this is the test render. |
 |
| Started adding materials and modifying environment. |
 |
| Added materials to surfaces that will potentially be reflected from the selected scene. |
 |
| Froze the camera to prevent the camera view from changing, it helps to identify the lighting, shadows and reflections that are to be taken into consideration. |
 |
| Creating textured materials using bitmap. A B&W version of the bitmap is used to bump the material to create the desire texture. |
 |
| First test render. |
 |
| Adjusted the camera and retested. |
 |
| Replaced the glass material for a more natural hue. |
 |
| Brought the camera closer for a better experience of the space. |
 |
| Day time render in progress. Took a long time to calculate the photon emissions. |
 |
| Adding free light to a space in class. Apparently the lights were too yellow. The material of the light is set to self-illuminate and also |
 |
| Readjusted type of light and intensity. |
 |
| Final render with wall thickness. |
 |
| Using the same camera view, I added free lights into the cylinder shaped lights I created using boolean to get a hollow center. The light appears dim. The room is darker after I turned off the daylight and mr Sky Portals. |
 |
| First test render for night view. Where's the light coming from? |
 |
| It appears that I still had mr Physical Sky turned on in my Environment settings. Disabled the map and the outside got to the right darkness of night time. |
 |
| Final test render to ensure the lightings and shadows are correct. |
 |
| Night time render in progress. This render was faster than day time. |
 |
| Final Render (Day) |
 |
| Final Render (Night) |
Friday, 16 May 2014
Work in Progress for Computer Applications
Project 2A: Still Renderings with Materials, Lights, Camera Views with Site Context (Exterior Renderings)
 |
| First time learning to render material using bitmap. This included how to modify the rendering using UVW Map, where we can adjust the size and settings of the bitmap. |
 |
| Assigning renderer Mental ray, which results in a different tone and quality. |
 |
| Experimented with lighting such as applying daylight system, omni light, target light and so on. |
 |
| We also learned how to displace the bitmap for rendering, which basically can be done by photoshopping the similar image into black and white. the darker parts will sink in and the lighter areas will remain. The same effect can be achieved by using bump on the bitmap. |
 |
| Reorganizing and creating the contour. This time, instead of using soft selection on the polygon like I did in the previous project, I tried to just drag the vertex of the editable poly to the desired location. It's more fitting and also allows my stairs below the building to sit against a slope. |
 |
| Sample of bitmap. |
 |
| Add caption |
 |
| To bump the bitmap. |
 |
| First attempt to test rendering. Apparently didn't tune the glossiness of the materials hence the reflective concrete and sand! Also the sea water was poorly bitmapped with to much transparency. Resulting in the reflective sand underwater to be visible. |
 |
| Elevation view of retreat house model. |
 |
| Another test rendering. It seems the daylight intensity was a bit off. Added a tree model into the scene as site context. The shadows weren't very obvious. |
 |
| More context and modifying the daylight. The sun light is coming from the west, hence, this is what the site would look like in the afternoon. |
 |
| After getting the camera fixed on a desired view, I did another test render just in case. |
 |
| Test render of evening daylight by the beach. |
 |
| Final exterior rendering 1000 x 800 at bird's eye view. |
 |
| Final exterior rendering of 1000 x 800 at eye level. |
Subscribe to:
Comments (Atom)